Ways to paint your nails without stains. Technique for creating a beautiful manicure. Application of PVA glue
How to beautifully paint your nails at home is a question that interests many novice girls who want to give themselves or their friends a manicure at home. In order to learn how to do a perfect manicure, you need to know some skills that are necessary for this.
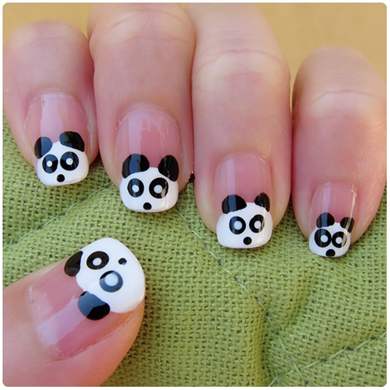
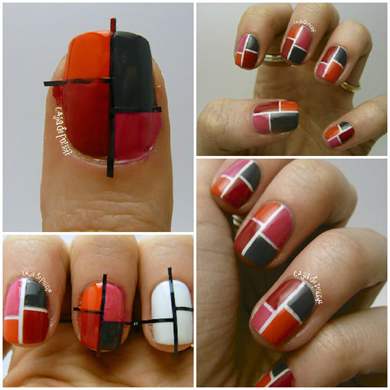
Interesting photos:


First you need to know how to properly apply polish to the nail plate.
If you have already encountered this and know how to paint your nails well, then success in this matter awaits you. In fact, there are a lot of ways to apply nail polish, which means that even if you don’t know how to paint your nails, there can definitely be a way for you.


First, let's look at the simplest method that any girl can definitely use.
It consists of covering the nail with one color. This is a standard method of painting nails and there is nothing complicated about it. Since single-color manicure has become popular again after some time after many options for complex styles, feel free to use this technique not only because it is simple, but also because it is popular.
Before you start painting your nails, be sure to apply one coat of clear polish to protect your nails from the harmful substances of further polishes.
After this, you can already paint your nails with colored varnish, starting from the middle to the bottom of the nail plate in small strokes. Then you need to paint the sides of the nail in the same way. When the first layer of colored varnish has dried, if you are not satisfied with the color, you can do one or two more layers to achieve the desired result. Remember that you should not dip the brush completely into the bottle of polish, as a large drop on the nail can ruin the entire painting and the layer will be uneven.
In principle, there is nothing complicated in this process, especially if you have at least a little idea about it. If they are not there, you can always watch how this happens in the video offered in the article. Also, it is worth remembering about the cuticles, the distance from which must be retreated by 1-2 mm for the skin to breathe. In those places where you got a little nail polish on the skin or cuticles, you can later wipe it with a cotton swab, dipping it in nail polish remover. In order for the manicure to last as long as possible, masters use clear varnish at the end. You can do the same. Another little secret Something to keep in mind is that you should always shake the polish bottle before use as this will help get rid of any clumps or thickening.


In this case, we will paint our nails with two colors.
This method is a little more complicated, but still simple if you follow all the steps correctly. In addition, a manicure that contains several colors, and in our case there are two, always becomes the center of attention. As a rule, in this case there are several coloring options. The more popular of them now is gradient, which also has several directions. For example, horizontal or vertical, smoothly transitioning from one color to another; gradient with sharp transitions of different contrasting colors; French manicure style, in which the tips of the nail are painted with one color and the main part with another; and the most popular - different colors on all fingers.
All of these double nail styles are more than popular this summer. But if we talk about the first option gradient manicure, then you still have to try here. To do this, you will need two colors of polishes that will not differ much from each other (hot pink and soft pink) and a makeup sponge or a regular sponge. Once all the tools are ready, you can start getting down to business. To do this, apply two colors to the sponge so that the distance between them is as small as possible. Next, you need to apply the sponge to nail plate so that the border between shades becomes blurred. Using this method of applying flowers, you can easily and simply go beyond the boundaries of the nail plate. Therefore, it is necessary to remove excess as quickly as possible.


What is needed for a good result
In order to paint your nails with three or more colors, you need to stock up not only with other tools, but also with patience, because not everything works out the first time, as we know, the first time is a bit of a disaster. So, to achieve more successful combinations colors, try to select two shades first, and the third is brighter and different from them. In our case, let's use pink, white and black as an example.
What are we going to do? We will apply the main part of the nail and the highlight with two matching colors, and the design with the third. To get a more successful manicure, you should not immediately set yourself a difficult task. For the first time, let these be ordinary images in the form of (un) neat blots. In this case, we will use white as the main color, pink to represent a large blot, and black to represent several dots on the pink spot. There are also other options where you can use multiple colors. For example, a striped manicure, in which you will need to add tape to the list of tools. By separating the strips with tape, you can achieve an even, neat and, most importantly, beautiful result.
Thanks to the skills of painting nails at home, you can save a lot of time and money, as well as get a lot of pleasant emotions during such an activity as a manicure. Enrich your ideas with new fantasies and do not forget about the stages of painting your nails and protecting them.
Video on the topic of the article:
A fresh manicure can please any woman, but only if it is done perfectly. However, very often it turns out that after spending a lot of time applying several layers of varnish, we find that the cuticle is stained with varnish, a kind of hell for a perfectionist. Attempts to eliminate the problem often aggravate it, since wiped varnish can leave streaks, thereby staining the skin, and any careless movement can ruin the beauty that took hours to create. Therefore, it is very important for every girl to know how to paint her nails without staining the cuticles, and it is this issue that we will now discuss.
Secrets of a beautiful manicure
Cases when a visit to the salon simply cannot be squeezed into your schedule are not that uncommon. But at the same time, I really want my hands to be spectacular and with beautiful nails. Just neatly filed, they don’t make such an impression, and everyone around them flaunts bright and original designs on their nails. Transforming your own in this way is not so difficult; the main thing is calmness, patience, and knowledge of small tricks, of course.

The first step towards a well-groomed and beautiful manicure is proper preparation nails: good shape and qualitatively removed keratinized cuticle. To improve the “adhesion” of the varnish and the nail plate, the latter needs to be slightly polished with a regular buff or a special file for polishing, and then degreased with acetone-free nail polish remover.
A properly selected varnish plays a significant role in a perfect manicure. Remember, only quality product You can paint your nails so as not to touch the cuticles. It is quite easy to recognize: a good brush that takes the shape of the nail when pressed, a viscous consistency that allows you to apply an even layer. Spreading varnishes are a taboo!

And of course, the application process itself. In addition to the varnish itself, it is advisable to acquire a base and top coat. The first will make application easier, and the second will consolidate the effect and allow the manicure to remain in excellent condition for quite a long time. That is, in the end we will get four layers: a base, 2 color layers and a fixative. Here's a simple formula for perfectly painted nails.
Application technique
If it was a secret before correct application owned only by masters of nail art, now it is of course impossible to keep it secret. As it turned out, everything is not at all difficult, but most of us still did it completely differently. The algorithm of actions is as follows:
- The first step, as we said earlier, is preparing the nail and applying a base coat. You can proceed to the next stage only after it has completely dried.
- Take the varnish and lightly squeeze the brush onto the neck of the bottle. We will paint the side on which the coating remains.
- Visually divide the nail into two parts with a vertical line. Stepping back a couple of millimeters from the bottom edge, we place a dot on it.
- By pressing on the brush, we seem to push the varnish to the edge of the lunula. With a good brush there should be no problems, since it spreads out evenly. As you understand, it is this stage that determines how evenly we paint our nails near the cuticle , Therefore, now you need to concentrate as much as possible.
- Having completed such a delicate work, we paint the entire length of the nail, adhering to the same line.
- To put on makeup lateral lines, we return to the starting point and smoothly move the brush along the side holes, having previously pulled them back.
- Having covered the entire surface in this way, wait for it to dry completely, after which we apply the second layer.
- The last stage is topcoating.

New technologies or how to apply gel polish under the cuticle
This type of coating is becoming increasingly popular because it helps preserve perfect view nails for as long as possible. However, many young ladies are not satisfied with the fact that after applying the gel, a small transparent gap remains between the skin and the varnish. Agree, it seems that the nail has already grown, and the manicure itself is not the first freshness.

Therefore, nail art masters have developed a new technique that allows you to “fill” the coating literally under the cuticle. There is a lot of debate about the feasibility and hygiene of such a procedure, but the unsurpassed effect makes it necessary to resort to it more and more often. So, we apply gel polish under the cuticle, the application technique is as follows:
- Make a high-quality edged or hardware manicure, while using a conical cutter to lift the edge of the cuticle slightly upward.
- Apply the base with a distance of a couple of millimeters from the cuticle and side holes.
- We pour the colored coating over the entire area of the nail, while additionally lifting the skin on the sides and the cuticle itself.
- Then we duplicate the color layer and apply a top coat. Let us remind you that each layer must be dried under a lamp.
- In order for the cuticle to return to its original place as quickly as possible, you need to lubricate it with caring oil at the end.
There is also a technique that allows you to apply makeup “butt-to-end”, that is, as close to the cuticle as possible. It uses a regular thin brush, which is used to pre-paint the “delicate” area. After drying this area, the nail is completely filled with varnish.
Ways to protect cuticles from varnish
While watching a huge number of training videos, you probably noticed that girls use various means which allow you not to worry about the accuracy of your future manicure. This is especially true for new techniques, for example, ombre, where almost half of the finger ends up dirty. So what are these magical methods and what do they smear the cuticles with when painting their nails? In fact, there are several methods, both improvised and professional.

There are several homemade options: Vaseline, rich cream and PVA glue. All of them are applied to the area that needs to be protected and can be easily removed with a regular cotton swab or sponge. The precautions are as follows: in no case should the chosen product get on the nail plate, as it will make painting impossible; If you decide to use a cream for these purposes, then try to choose the one that is as rich as possible; it is best to use the so-called “winter” series, aimed at protecting against frost and bad weather.


Among professional means The most popular now is skin defender, thanks to which the question of how to carefully paint nails at the cuticle becomes completely irrelevant. You simply apply the composition to the skin, wait for it to dry and start painting, then easily remove the film and that’s it. Your fingers will delight you with a neat manicure!
Similar materials


As evidenced by the inscriptions on the walls of the tombs of the pharaohs, drawings for decoration female body, including drawings on nails, were present not only in rituals, but also for everyday decoration.
Today, the technique of creating a manicure has significantly improved - these are acrylic and gel, mixed versions, tips and applying varnish to your own, natural nail. Thanks to the use of acrylic paints, you can easily create a beautiful manicure at home.
All you need is the desire to give yourself a stylish, beautiful and free manicure. These are not all the benefits you should be aware of. First of all, please note that acrylic paints They wash off very easily with water, so you can change the design as many times as you like.
Second is ability to mix paints to the most incredible shades. Therefore, it is not so difficult to paint your nails beautifully even at home.
How to beautifully paint your nails at home

First, you need to do a basic nail manicure. This can be any option - from the standard one with one varnish as a base to ready-made tips. After the base is ready, you can proceed directly to the acrylic drawings themselves.
To do this you will need water and brushes, a small piece of paper or glass. You can try mixing acrylic with water on glass or paper, see what color you get, and try to create a design.
Then move on to the nail. If you are not satisfied with something, you can always wash it off and beautifully paint your nails again. It is worth remembering that such designs must be applied to a filed, grease-free nail, and after drying, cover with two layers of gel or clear varnish.
The convenience of acrylic also lies in the fact that patterns can be changed quite often without damaging the main part of the nail plate. Simply wash off the top of your manicure and create a new masterpiece.

DIY manicure at home
A “home” manicure done by yourself is a simple matter if you know and take into account all the nuances. Today we are talking about how to paint your nails beautifully at home. Therefore, you should know the rules for performing a beautiful manicure.
Of course, sometimes it’s much easier to turn to professional craftsmen or visit a beauty salon, but in times of crisis, and in general, in order to save money, good manicure You can do it yourself.
Preparing to paint your nails
So, first you need to prepare your pens. The remnants of old varnish are carefully washed off and special baths are prepared for the handles. They can be very different in their properties: strengthening, moisturizing, toning - choose according to your taste and needs.
Here are some options: in a basin or large bowl with warm (even slightly hot) water, add a couple of tablespoons of soda, a little of your favorite shampoo and a few drops of any essential oil. You need to keep your hands in this composition for about ten minutes.
If the skin on your hands is rough and requires additional care, do this before the bath. peeling. Mix coarse salt and vegetable oil (for example, olive) in equal proportions (1 tablespoon each). Rub the resulting mixture thoroughly over your hands: the salt will exfoliate the skin, and the oil will moisturize it.

Let's start manicure
After such care procedures, you can do the manicure itself. To begin, use a good file to give your nails the desired shape, making sure that all nails are the same length. Next, carefully push back the cuticle; for this it is advisable to use orange sticks, but if you don’t have them, a special spatula from a manicure set will do.
By the way, cutting the cuticle is not recommended: firstly, you can cut the already delicate skin at the base of the nail, and secondly, if you cut it, it will then grow even more.
After the nails have been given the desired shape and length, you need to polish them (if they have any unevenness or roughness) and you can start decorating.
The most difficult thing is to apply the varnish evenly

Choose the nail polish that you like, not the one imposed by fashion. Although it never hurts to listen to her. The fact is that you can easily paint your nails without completely observing fashion trends. At the same time, they will look very beautiful.
Before applying colored varnish, use a base or at least a regular transparent varnish - this will save your nails from the unnecessary tint that is formed when using too bright and pigmented colors.
For example, if you apply red polish directly to your nails, they will take on an unsightly yellowish-orange tint. If you use light translucent shades of varnish, try applying white or milky varnish instead of the base - then the color will be as beautiful as in the bottle.
Depending on the texture and pigmentation of the varnish, it is applied in one or two layers. If the varnish goes on evenly from the first application, and the color saturation suits you, then a second coat is not needed. A second coat is usually required for translucent polishes to get more pigmentation.
Important point: wait at least 10 minutes before applying a second coat, even if you think the polish is dry enough. There is no need to apply a third layer of varnish - the product will take a very long time to dry, and the chance of smearing it will be very high.

How to apply varnish
The varnish itself is applied as follows: first, the brush is placed on the center of the nail, and the color is carefully distributed to its base, as if “sealing”, then the brush distributes the varnish towards the tip of the nail.
Next, one edge is painted with one broad stroke, then the second in the same way. The nails on the little fingers are painted with one stroke. At the same time, there should be enough varnish on the brush; if there is too much of it, you will get a blot, the varnish will spread beyond the nail and stain the skin.
If you don’t put enough of it on the brush, you’ll have to make additional strokes, which ultimately doesn’t look entirely aesthetically pleasing, especially if the product itself has already begun to thicken. If desired, you can decorate your nails with stickers, appliques, rhinestones, etc. You can paint your nails beautifully even on your own at home.

The final stage is drying
In principle, at this stage the painting of the nail itself is completed, but if you also have such a means as drying the varnish, then be sure to use it. It will not only fix your manicure and extend its life, but also add strength and glossy shine to your nails. If there is no drying, it’s okay, you can apply a transparent varnish, or leave it like that.
After the varnish has completely dried, apply a drop of oil to the cuticle and your favorite nourishing or moisturizing cream to the skin of your hands.
In this article we tried to cover the topic for you: .
We hope the information was useful and relevant for you to use in your life. Always stay on top, thank you for your attention, women's online magazine website
“Being perfect is easy!”
Take care of yourself and be healthy!

Find out now
Beautiful manicure on well-groomed nails visually lengthens your fingers and adds an interesting accent to the stylish appearance and in combination with clothes, accessories, makeup helps to form your unique image. Before painting your nails with varnish, it is important to give the desired shape to the nail plate, prepare its surface for applying the base, main and fixing layers. Place on the manicure table suitable nail files (glass or laser for natural nails or metal for extended ones), tweezers, pusher, orange sticks and other tools necessary for manicure.
From this material you will learn how to beautifully paint your nails with varnish for a single-color or two-color manicure. Tips and step by step videos lessons will help beginners correctly apply layers on the nail plate with a brush, select varnish colors (monochrome, contrasting, related) to create a stylish and harmonious nail design.
Before painting your nails in translucent or pastel colors, it is advisable to give the nail plate a square shape with rounded edges. In general, pastel and nude shades look perfect on short nails. If you have a manicure on short nails and want to visually lengthen your fingers, then you can apply a translucent varnish with a pearlescent effect to the central part of the nail plate. For decoration long nails you can choose a dark-colored varnish and complement the design with a vertical pattern in bright, rich colors. Today, monochromatic designs on nails made with dots or brushes are in fashion. For example, brushes No. 3 are very convenient for painting areas between thin lines drawn with brushes No. 00, and straight lines are convenient for painting with brush No. 1.
The bright red color of the manicure will be interesting to combine with a black and black wardrobe. white, with a dark gray dress. But if you want to wear a red dress, then choose a manicure with the same shade.
♦ HOW TO CHOOSE THE CORRECT VARNISH AND PAINT YOUR NAILS IN TWO COLORS
The widespread use of two-color manicure continues largely due to the unprecedented popularity of the French manicure, which many women choose to decorate their nails this year. Modern French manicure includes a variety of solutions for fashionable nail design. By combining different shades of varnish, you can create a very beautiful, original manicure. But it is important to consider some rules when combining varnishes different shades and textures so that your nail design doesn’t turn out tasteless. Today you can purchase polishes from popular brands with already formed color pairs. In any case, it is best to use varnishes for two-color manicures of the same brand.

- in the photo: examples of choosing related, monochrome, contrasting shades according to the color palette
▪ How to beautifully paint your nails by combining polish colors that are located next to each other in the color palette (related).
Harmonious pairs of related colors of manicure polish:
√ yellow with green;
√ orange with red;
√ eggplant with dark blue;
√ lilac with dark blue;
√ purple with blue;
√ blue with light green.

- in the photo: examples of manicure with a combination of related varnish colors
▪ How to beautifully paint your nails by combining different shades of polish of the same color. A monochrome combination allows you to create a harmonious manicure using shades that differ in color saturation and lightness.
Harmonious pairs of monochrome shades of manicure polish:
√ light green with dark herbal green;
√ lilac with violet;
√ light blue with dark blue;
√ muted orange with warm brown;
√ apricot with coral;
√ violet with cherry.

- in the photo: examples of manicure with a monochrome combination of varnish shades
▪ How to beautifully paint your nails by combining opposite colors of polish. Using a contrasting color combination will help you create a catchy, daring manicure under a bright dress for going to nightclub or to a fun party.
Harmonious pairs of contrasting polish colors for a two-tone manicure:
√ coral with turquoise;
√ purple with yellow;
√ bleached lemon with pastel lilac;
√ blue with orange;
√ light pink with light green;
√ yellow-green with purple.

- in the photo: examples of manicure with a contrasting combination of varnish colors
▪ Varnishes of achromatic colors are also widely used today in modern manicure to create fashionable design. Combine different shades of gray, white, black - including popular combinations of glossy and matte shades. Nail designs with achromatic colors can be complicated with bright patterns, beautiful rhinestones or other nail art decorations.

- in the photo: manicure using achromatic colors
★ By the way, today nail design is back in fashion with highlighting several nails in a color that differs from the general manicure. Most often, this emphasis is placed on the nails of the ring and middle fingers. You can select individual nails smooth transition ombre shades. To use different shades in color stretching, it is enough to take two colors of varnish and mix them, changing the concentration of one of them.

- in the photo: manicure with several nails highlighted in a different color
♦ VIDEO LESSONS FOR BEGINNERS
Hands - business card women, according to Coco Chanel. It’s hard to disagree with this, since everything from age to social status That’s why it’s so important to pay attention to hand skin care and manicure. But the only thing worse than a complete lack of nail coverage is an untidy manicure. This will never happen to those women who know how to properly apply nail polish.
The advent of gel polishes has made a real revolution in manicure, making it possible with minimal time to obtain a durable coating for two to three weeks, which will be almost completely unaffected by external factors.
The advantages of this nail coating have prompted many women to learn new technology at home, and for those who are still thinking about it, it will be useful to know what tools and materials are needed for a manicure with gel polish, and what are the stages of applying the coating.
Required Tools
New nail coloring technology requires the use of not only new materials, but also new tools.

A basic set for covering nails with gel polish includes:
- lamp for coating polymerization;
- buff, also known as a polishing file;
- degreaser;
- base coat;
- gel polish, selected shade;
- finishing coating;
- sticky layer remover.
Let's take a brief look at each of the points to understand their purpose. Gel polish will not dry in the usual way; this requires a special lamp. There are three types of such lamps: ultraviolet (UF), light-emitting diode (LED) and combined (CCFL).
For beginners, a 36 W UV lamp will be sufficient for home use. The radiation of an LED lamp is absolutely harmless to the human body, and a used device does not require special disposal. In addition, although these lamps shine more dimly and look compact, they dry the varnish four times faster. A 9W LED lamp is equivalent to a 36W UV lamp. Combination lamps are intended for professional use.
Before applying varnish, the nail must be prepared: lightly sanded and remove dust and natural deposits of fat. For this purpose, a sanding file with an abrasiveness of 900 grit and a degreaser-disinfector are used. Sometimes it is replaced with a 70% alcohol solution.
A transparent base varnish (coating) makes the surface of the nail as even and smooth as possible, and also prevents pigment from getting into the keratin layer of the nail plate. The purpose of colored gel polish is the same as regular gel polish – to paint the nail in the chosen color.
The final coating not only protects the manicure from external negative factors, but also gives the varnish glossy shine, or matte roughness. Not all particles of the gel coating polymerize in the lamp; they make the surface of the nail sticky. To remove it, use means to remove the sticky layer. IN lately They began to produce finishing varnishes without a sticky layer.
Additionally, for manicure with gel polish you can use:
- a primer that will strengthen the adhesion of the layers of varnish to the nail;
- lint-free wipes, which, unlike conventional ones, cotton pads do not leave small fibers on the nail during degreasing or removing the sticky layer;
- cuticle oils, you can purchase special mixtures or buy apricot, grape or almond oil at the pharmacy.
Manicure with gel polish: stages
Having given your nails the desired shape with a nail file and tidied up the cuticles, you can proceed to a manicure with gel polish.

Application technology and stages:
- Preparing the nail plate. At this stage, you should lightly walk the buff over the nails, but without strong pressure, without filing it down. After soaking a cotton pad or lint-free cloth in a degreaser, wipe the nail, not forgetting to pay attention to the side ridges and the end of the tip of the nail. At the same stage, you can apply primer to your nails.
- Application of gel coating. A gel polish manicure involves applying 3-4 layers of coating, each of which should be polymerized for 2 minutes in a UV lamp and 30 seconds - 1 minute in an LED lamp, depending on the power. The layers are applied in the following sequence: base, colored gel polish in 1-2 layers, topcoat.
- Removing the dispersion layer and caring for the cuticle. Using a cotton pad or a special napkin, remove the sticky layer from the nail plates using an appropriate product. This will not only extend the life of the manicure, but will also protect the body from allergenic particles that may be present in the varnish. Applying oil to the cuticle is not only a pleasant caring procedure, but also provides additional nutrition to the nail plate.
How to properly remove gel polish from overgrown nails
Due to the durability of gel, it cannot be removed from nails as easily as regular polish.

To avoid damaging the nail, all actions should be performed in accordance with the following technology:
- First, the surface of the coating on the regrown nail should be lightly treated with a buff. This will help remove the polish faster.
- Soak a cotton pad generously in gel polish remover. Then apply it to your nail and wrap it tightly with a small piece of foil. Leave your nails in this position for 10-15 minutes.
- Next, remove the foil and cotton pad, and remove the coating using an orange stick or a plastic pusher. You should not try to remove the polish with a metal tool, so as not to damage the nail plate. If necessary, lightly polish the nail with a polishing file, removing small particles of the coating.
How to make drawings?
You can make a monochromatic coating more interesting and add individuality to your manicure with the help of drawings. Nowadays there are a sufficient number of techniques that allow you to apply unique patterns on your nails at home, even without artistic talent.

Let's look at some of them:
- Stamping. To make drawings using this technique you will need a stamp, a scraper, stencils with a design and stamping paint with a high pigment content. Small quantity The paints are applied with a brush to the stencil with the design you like, the excess is removed with a scraper, then the design is applied to the stamp with a rolling motion, and then applied to the nail with the same movement.
- Nail stickers. Available for sale ready-made drawings— transfer stickers for every taste. To apply such a design on a nail, you need to cut off the design or fragment you like, hold it in water for a while, separate it from the paper backing and transfer it to a varnished nail, dry it and cover it with a finish.
Interesting nail designs can be created using special foil, rhinestones and mirror rubbing.
How to paint your nails with regular polish?
Despite all the advantages of gel coating, regular varnish, perhaps a little less than before, is also in demand, since coating with it is easier and cheaper than gel polish, and existing durable varnishes allow you to keep the coating in its original form for up to seven days.
Preparation
Before applying regular polish to your nails, they also need to be prepared. To do this, they are first given a neat shape using a nail file.

Then the cuticle is softened by holding it in a warm soapy bath or applying a special oil to it. The softened cuticle is pushed back with an orange stick, or carefully cut with scissors (for trim manicure).
The preparation of the nails is completed by degreasing them. Nails washed with soap should be dried, wiped with an alcohol solution and dried again. On such nails, regular polish will last longer.
Applying base coat
Primer, base, substrate, base - this is another name for the base coat for varnish. There are various types bases, among which there are medicinal ones, restoring thin and fragile nails, with a whitening effect and leveling ones. The latter, thanks to microparticles of talc and silk, make the surface of the nail smoother, after which regular varnish lays down in a more even layer.

The main function of the base coat is to provide a tighter adhesion between the nail and the varnish, as well as protect against pigment penetration deep into the nail plate and yellow subsequently. Typically the base coat is clear or white. It must be applied in one thin layer. Allow at least 10 minutes for the base to dry thoroughly.
Correct coloring
Once the base coat has completely dried on oil-free nails, you can begin applying the polish. If you are right-handed, you should start painting your nails with the little finger on your right hand; if you are left-handed, do the opposite. Before applying regular varnish, the bottle with it should be shaken thoroughly in your hands to achieve a more uniform consistency and even layers.

Dipping the brush into the varnish, wipe it on the neck on one side, and cover the nail with the varnish remaining on the outer edge, progressively moving from the tip of the nail to the cuticle. This will prevent the varnish from bleeding. Cover all nails in this way and let them dry thoroughly. Then cover with a second layer of varnish.
Using a fixative
In order for the manicure to last for five to seven days, you need to firmly glue all the layers on the nail plate. For this purpose, special fixatives are used - “smart enamels”. Such products will not only extend the life of your manicure, but can also make the coating more even and give a beautiful glossy shine without changing color.

The fixative is applied in the same way as regular varnish, but you can apply it every day. Drying remains an important condition; each layer of coating for any manicure must dry thoroughly.
How to speed up drying?
Regular varnish takes a very long time to dry.

It takes 10 to 20 minutes for one coat to dry thoroughly, but there are several ways to speed up the process:
- Special drying agents. They come in the form of a spray or liquid in a bottle, which is applied with a brush. The effect after using this product is a completely dry coating in a minute.
- Bath with cold water. If you dip nails coated with regular polish into a container with cold water and ice cubes, the solvent will quickly wash out, which will dry out the polish and make the manicure more durable.
- Vegetable oil. One drop of olive or other vegetable oil applied to the nail two minutes after painting will make it dry much faster (in 5-7 minutes).
- Using special drying devices or a hair dryer in cold air mode. In the latter case, it is important not to bring the hair dryer too close to the nails at first, so as not to spoil the coating with “ripples”.
When applying designs to nails using stamps and stencils, the skin around the nail often gets dirty. To protect it, latex varnish is used, which creates a film on the skin that is easy to remove later. If such a product is not available, it can be replaced with ordinary PVA glue.
The perfect white stripe french manicure without stencils, you can draw using a rubber band fixed in the desired position. And if you do end up with unevenness, you can disguise them by brushing along the joint with a brush dipped in colorless varnish with glitter.
To protect the delicate skin of your hands from the aggressive effects of gel polish remover, it should be lubricated with a greasy cream or Vaseline.


